 McAfee suite is the best for computer security and safety purpose. It is bundled with a site advisor safety application that is a tool which gives you protection while surfing the internet. It gives you alerts against unsafe websites and is compatible with Internet Explorer, Firefox, and Chrome. However, sometimes you may need to disable the McAfee SiteAdvisor as you may face problems like slowing down of browsing speed. When you try to disable this tool, you might face difficulties. Don’t worry in this article we will guide you on how to remove this tool or remove McAfee SiteAdvisor from your PC, Mac or browser. If you have any issue or query, you can contact McAfee Antivirus Helpline.
Steps to uninstall McAfee SiteAdvisor from PC To remove McAfee SiteAdvisor tool from your machine, follow the steps given below: -
0 Comments
 QuickBooks is an accounting application that is used on small and medium business. Your company may get assessed bank fees depending upon the type of financial services you are using. You might face financial charges for a bounced check, a monthly checking account fee, or a fee for downloading transactions to QuickBooks. So, it becomes important to record regular bank and credit card charges. You can record your regular bank and credit card fees within your registered account. In this article, you will learn how to record credit card finance charges in QuickBooks. In case, if you need some help, then you can go to QuickBooks Online Support.
Recording financial charges in QuickBooks In order to record the credit card finance charges in your QuickBooks, you need to follow the steps given below: -
 Are you setup Avast Antivirus to protect your device from online or offline threats but somehow you not able to repair it? If yes, then no needs to worry as now you can repair your Avast with just a few steps with help of Avast Antivirus Helpline. This helpline is also helping you to get rid of issues like:-
By fixing or replacing program files the repair process resets your software configuration that may be out of date, missing or corrupted. NOTE: Some customized settings may be preserved, when you repair Avast Antivirus, yet, to their default configurations other settings may return. Steps to Repairing Avast Antivirus in Windows are as follows:- Step-1: With administrator permissions log into Windows as a user and make sure no other antivirus or application software is running on your computer. Step-2: On Start button simply right-click and then choose Apps and Features from the menu that appears. Step-3: In the left panel ensure that Apps & Features is selected, then click your version of Antivirus Step-4: Select Modify. Step-5: Click “Yes”, if prompted by the User Account Control dialog for permissions Step-6: Click Repair, when the Avast Setup wizard appears Step-7: Wait while setup maintenance Avast on your PC. Step-8: Click “Done”when the repair is complete. Given steps are maybe tricky to follow for novice then dial Avast Help phone Number and let experts resolve your issues with ease. Source URL Link : https://bit.ly/2EF7x52  Want to access Cox email on your iPhone or iPad or want to know the procedure of Cox Set up? If yes, then follow the given steps. At this page, you will know the Cox mail settings for both iPad and iPhone. Besides an overview with the pop3 or imap server mail settings for Cox, here you can get steps to set up your Cox email on your iPad or iPhone. additionally you can get Cox email customer help from technical Experts. Steps for Cox Mail Setup iPhone and iPad are as follows:- Step-1: Choose settings Step-2: Scroll down the screen as well as choose option Mail, Contacts and Calendars Step-3: Tap on the Add account and then select option “Other” Step-4: Tap on the Add Mail Account and then provide below given information: • Name -> Enter your name • Email -> Enter Cox email-ID • Password->Enter your Cox password • In Description -> Enter "Cox" Step-5: Select pop3 in the incoming mail server and then provide following info: • Hostname-> pop.cox.net • Username-> email • Password-> provide your password Step-6: Enter the following information under outgoing mail server:- Hostname-> smtp.cox.net Username-> email Password-> your email-password Step-7: In the next screen select your email address. Tap on save Step-8: Scroll down screen choose SMTP under outgoing mail server Step-9: Make sure the following information is displayed under the Main server choose smtp.cox.net • SSL-> none • Server port -> 25 Step-10: Tap done and get Cox Email service if still, you are not able to access your email account. You can dial Cox Email phone Number to get the real-time assistance of an expert from Mycustomerservice.  The Avast antivirus is known for providing remarkable security service to all customers. Although, it is known for its reliable quality security services, still sometimes you may come across a few technical issues with it that you may found tricky to solve. You might come across issues while net surfing or downloading any software. Sometimes you may come across issues while you are not updating the Avast antivirus version. In case you want to identify with how to set up Avast free antivirus 2018, then simply read this post. Due to the error code 42127, the users of Avast sometimes face a problem. In case you are getting a technical then you need to get experts help. Because of Avast antivirus software error code 42127, the system gets crashed or performs badly. The Reason behind getting error code 42127:- 1. You download the corrupted version of Avast antivirus from the official site. 2. The windows files are corrupted, because of virus or malware infection 3. By mistake, you delete the Avast antivirus files. Steps to Troubleshoot The Avast Error 42127 Are As Follows:- Step-1: First of all, repair registry entries associated with error 42127 Step-2: Conduct Scan of Your PC Step-3: Clean out temporary files and folders with disk cleanup Step-4: Update your computer device drivers Step-5: To "Undo" recent system changes utilize windows system restore Step-6: Uninstall as well as reinstall the Avast associated with error 42127 Step-7: Run windows system file checker Step-8: Install all available windows updates Step-9: Execute a Clean Installation of Windows If these steps don’t work well and then dial Avast antivirus number to get experts assistance to fix this issue or other technical issues at Mycustomerservice. Source URL https://bit.ly/2LV78i0  Want to reduce amount of spam emails you received in your Cox email box? If yes, then read tips given in this blog and apply them according to your need. Actually, given tips to help you to reduce the amount of spam you are experiencing.
 Want to recover Kaspersky Antivirus Forgotten Password or Passcode, but don’t know how to do so then no need to worry here you can get Kaspersky technical support and complete solution of your issue . Actually, a password or passcode is used to do the following:
1. Protect program against being exited or removed 2. Protect application settings 3. Help you to Sign in to the My Kaspersky portal 4. Shield data vaults that have been produced with a Kaspersky Lab product 5. Change the Kaspersky Safe Kids settings on a parent’s device 6. Protect data in Kaspersky Password Manager While you try to make modification in the format XXXXX-XXXXX-XXXXX-XXXXX, the Kaspersky Lab application requests a code; it means you need to enter your activation code for further processing. For information about where to find your activation code, see this article. If you want to remove the application, then a Kaspersky Lab application will prompt you for your password. Enter the password and exit the application. At a prompted window, you can change the application settings or Backup/Restore or managing Parental Control. For accessing the application settings, the computer user sets the password. If still you are getting your issue unchanged or want Kaspersky Internet Security Update, then call experts via Kaspersky Antivirus Support Number and let experts handle your issue with ease. Visit directory called Mycustomerservice to get toll-free to get real-time assistance from experts with ease. Want to download McAfee antivirus, but download might fail with an error 7305 or 12152? If yes, then no need to worry as a solution of these error codes are now able.
The main cause of the 7305 or 12152 error slow internet or download to disconnect or fail. Commonly, it will get ahead if you wait 15-20 minutes a short while longer and try your download again. Solution:- In case you still not able to download as well as install after waiting a few minutes, then follow given steps: Step-1: Use our Virtual Assistant via McAfee antivirus support to get troubleshooting steps. Step-2: Use the manual steps if you don’t want to contact experts. Step-3: First of all, download as well as run the Pre-Install tool Step-4: Download the Pre-Install Tool by clicking on the file Pre-Install_Tool.exe and then follow the ongoing instruction. Step-5: Read the warning message as well as click on the OK button to agree to the changes. Step-6: After the Preinstall Tool completes -> Click OK-> Close-> Restart your computer If you are a novice and found above-given steps tricky to follow then no need to worry just call experts via McAfee phone number which is listed on Mycustomerservice directory and let an expert handle your issue with ease. The best part is you can enjoy the real-time assistance of experts even if you are using other security software 24X7. 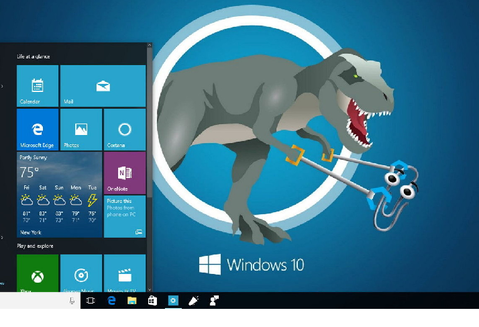 Want to update your Windows 10 system but not able to do because of some annoying error code? If yes then no need to worry here you can solution of your issue with ease.
Actually, there are many reasons why you might receive an error message when installing or upgrading Windows 10. A few common updating errors are as follows:-
Step-1: First of all, check your device has enough space at least 16 GB with the 32-bit processor. Step-2: Download as well as install all available updates in Windows Update of hardware updates, software updates, along with some third-party drivers. Step-3: Check third-party drivers and also download updates if available. Step-4: Remove all external storage devices and drives, or unplug extra hardware. Step-5: To check Device Manager Errors, simply select the Start button, type device manager in the search box on the taskbar and then select “Device Manager” from the results. Right-click the device name as well as select either Uninstall or Update Driver Software to correct the errors. Step-5: Remove third-party security software. Step-6: Repair hard-drive errors by choosing Start button -> type command prompt in the search box on the taskbar, Type chkdsk/f C: command and press the Enter key. It repairs automatically, and you will be asked to restart your device. Step-7: Do a clean restart into Windows as well as restore and repair system files. If you found above-given steps tricky to follow then get experts assistance via Microsoft Windows 10 phone number which is listed on the Mycustomerservice directory. Want to change WAN speed of Tenda router and don’t know how to do so then no need to worry just follow given steps to obtain a solution.
Step-1: After logging into the setup page, click on Advanced Settings or Advanced directly Step-2: Again choose Advanced Settings and then choose WAN Speed or WAN Speed directly. After that, change the WAN speed to be 10M Half-duplex or 10M Full-duplex. Note: You should select Network first for dual-band router such as N60, and then select WAN Port, and simply point to Duplex. Now, change the WAN Interface Speed to be the 10M Half duplex or 10M Full duplex. Step-3: Reset the Tenda device to factory default settings:- From the main menu of the device, simply select option System Management/Tools and choose to Default “Restore to Factory”. In addition, you can reset the Tenda device to factory default there. Step-4: Search an RST or Reset button on Tenda device side as well as hold down it for 10-15 seconds. You will discover that all the indicators turn off or on during which time, as well as some of them, will back off or on future. The Tenda device will be erased all of the customized settings after resetting. Note: You may encounter an upgrading page after resetting W150D/W300D, and to solve the problem you can power cycle the W150D/W300D. If you still cannot access the Internet, you may need to get Tenda Router customer Support. |
AuthorWrite something about yourself. No need to be fancy, just an overview. Archives
July 2019
Categories |
 RSS Feed
